How to Build Your First “Mini-Site” on an Aged Domain (A Step-by-Step Guide)
You did it. You navigated the auctions, won your domain, and successfully completed the post-acquisition steps. You now own a promising aged domain, brimming with backlink potential. Now what?
The most powerful strategy for monetizing this new asset is to develop it into a ‘mini-site.’ This is just one of several proven ways to make money with expired domains, but it’s often the most profitable for building a long-term asset.
This ‘rebuild’ strategy is one of the two main paths. The other is to redirect the domain’s authority to a site you already own. You can learn when (and when not to) 301 redirect an aged domain in my advanced audit guide.
This guide focuses on the ‘rebuild’ path: turning your domain into a small, 5-10 page authority site built to capture its existing SEO value. But you can’t just install WordPress and start writing.
Building on an aged domain is a technical process. If you do it wrong, you’ll lose all the “link juice” you just paid for.
In this guide, I’ll walk you through the exact, step-by-step process I use to build site on expired domain, from the final spam check to your initial content strategy.
Step 0: The Final Pre-Build Check (Don’t Skip This!)
Before you ever point your domain to your host, you must do one last check. You need to be 100% certain you aren’t building your new house on a toxic foundation.
- Check for Manual Actions: If the domain was ever connected to Google Search Console, the previous owner may have left it verified. Try adding it to your GSC. If you get in, check for any “Manual Actions” (penalties). If you can’t, don’t worry, but this is a good first check.
- Run a Final Backlink Audit: Open Ahrefs one last time. Does the backlink profile look clean? If you have any doubts, now is the time to create and submit a disavow file to Google, before you associate the domain with your brand. For a full refresher, see my Definitive Guide to Valuing Expired Domains.
Step 1: Point DNS to Your Host & Install WordPress
This is the first technical step.
- Point Your DNS: As we covered in the post-acquisition checklist, you need to log in to your registrar (like Cloudflare or Namecheap) and point your domain’s A Record or Nameservers to your web host (like WP Engine).
- Install WordPress: Once the DNS has propagated, install a fresh, clean version of WordPress.
- Install Essential Plugins: Before doing anything else, install your core plugins:
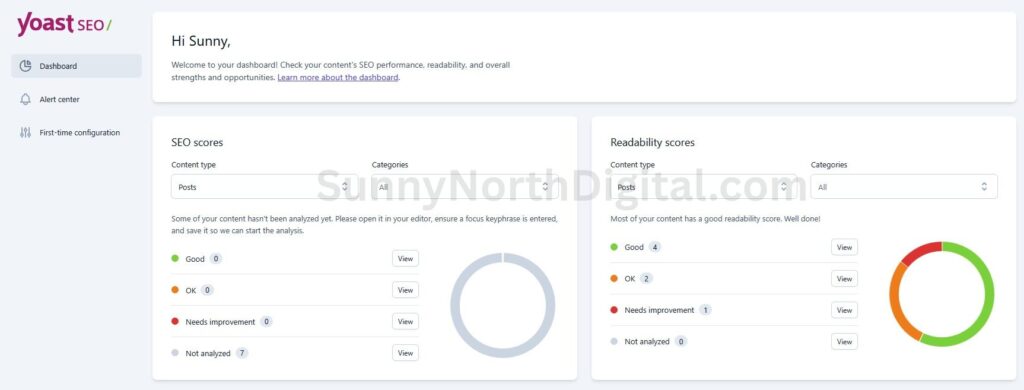
- An SEO Plugin (Yoast or Rank Math)
- A Caching Plugin (if not using a managed host like WP Engine)
- A Security Plugin (like Wordfence)
Step 2: Critical WordPress Configuration
Before you write a single post, configure your new WordPress site for success.
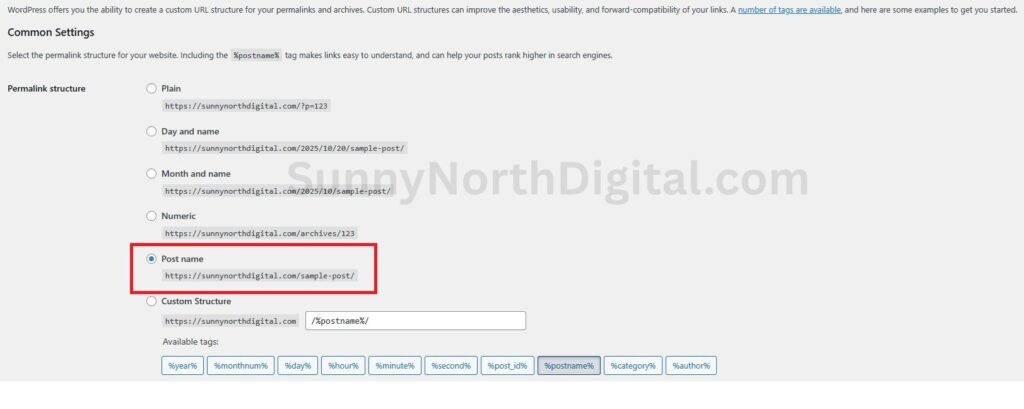
- Set Permalinks: Go to
Settings -> Permalinksand set the structure to “Post name”. This is the cleanest and most SEO-friendly option. - Delete Default Content: Delete the “Hello World!” post and the “Sample Page.”
- Set Your Category: Edit the default “Uncategorized” category to be your primary topic (e.g., “Military History,” as we saw in the
foxfall.comaudit).
Step 3: The 301 Redirect Strategy (The Most Important Step)
This is the step that 90% of beginners get wrong, and it’s where you’ll capture all the value of the domain. You must redirect the old, linked-to pages to your new, relevant content.
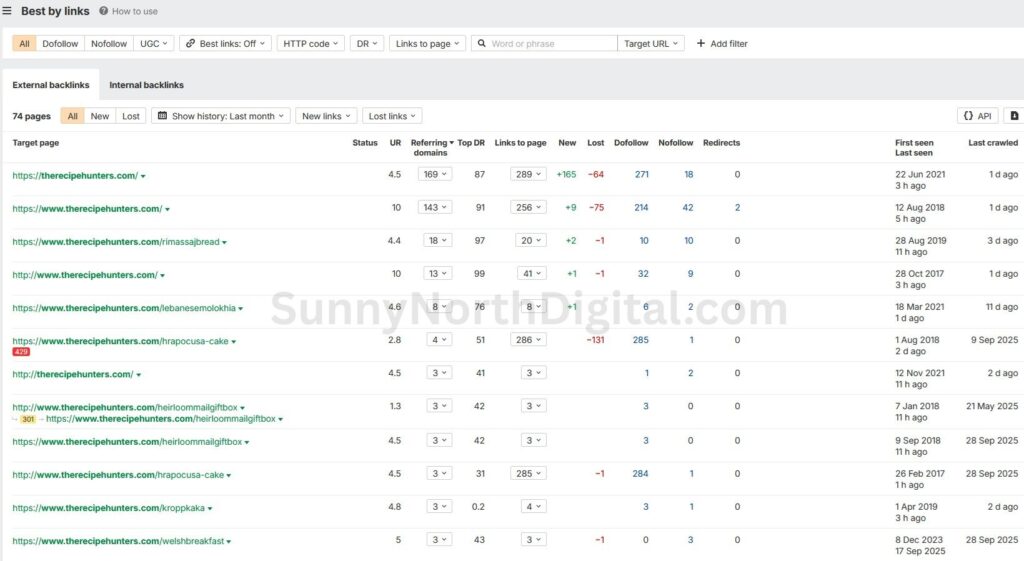
- Find the Valuable Old Pages: Go to Ahrefs Site Explorer and enter your expired domain. In the left sidebar, go to “Best by links.” This report shows you which specific pages (URLs) on the old site have the most backlinks.
- Create a Redirect Map: Open a spreadsheet. In Column A, list all the old URLs that have valuable backlinks. In Column B, decide where you will redirect them.
- If an old URL (
/old-article-on-medals.html) has backlinks, you should redirect it to your new, relevant category or homepage. - The goal is to have zero 404 “Not Found” errors for any page that has backlinks.
- If an old URL (
- Implement the Redirects: Use a free plugin like “Redirection” to easily add these 301 (permanent) redirects. For every valuable old URL in Column A, you are now telling Google, “Hey, that old page is gone. Please send all its authority to this new, relevant page.” This is how you reclaim the expired domain backlinks and power up your new site.
Step 4: Your Initial Content Strategy (Rebuild Topical Relevance)
Before writing your first piece of content, it’s crucial to understand who you’re competing against in the domain’s original niche. For a detailed workflow on how to analyze your niche competitors using Ahrefs, see my guide on Ahrefs competitor analysis for new niche sites.
Understanding the competitive landscape helps ensure your content strategy aligns with the domain’s original topic while also identifying opportunities.
If the domain’s best backlinks are from military history sites (like our foxfall.com example), your first 5-10 articles must be about military history.
But how do you find the perfect modern keyword that bridges your old authority to a new, rankable topic? This is the most critical part of the content strategy. I’ve created a complete, hands-on Semrush workflow for building this “Topical Bridge” in a separate, deep-dive guide.
- Why? You need to prove to Google that you are a legitimate, high-quality resource on the topic that the domain already has authority in. This re-establishes trust.
- Action: Your first posts should be a “topic cluster” around the domain’s original niche. If you are unsure what a topic cluster is, my SEO glossary can explain. For the complete, tool-driven workflow, see my guide on how to build a topic cluster with Semrush.
Step 5: On-Page SEO & Launch
Now you can finally start publishing.
- Write and Optimize: Write your first 3-5 high-quality articles. Optimize the titles, meta descriptions, and images, and be sure to link between your new articles.
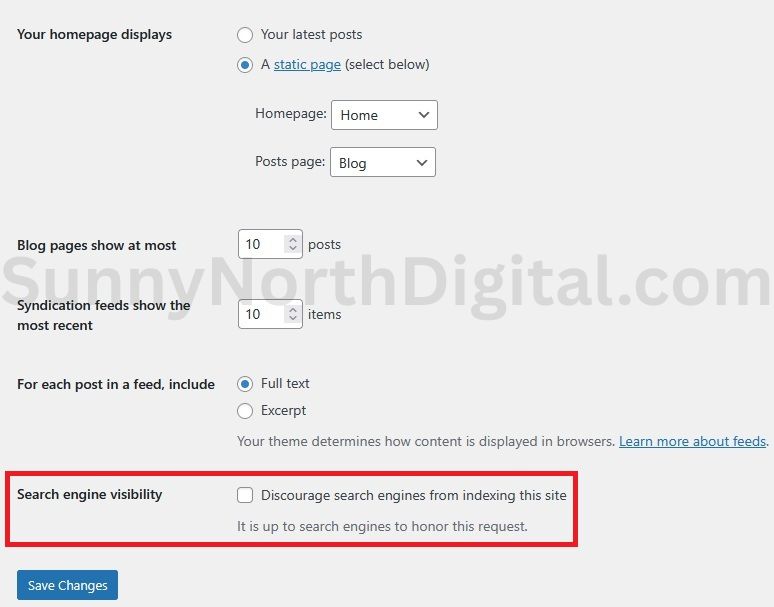
- Go Live: Go to
Settings -> Readingand uncheck “Discourage search engines from indexing this site.” - Submit to Google: Go to Google Search Console, submit your new sitemap, and use the “Request Indexing” tool for your homepage and your first few articles.
From Aged Domain to Active Asset
Is building on an expired domain worth it? Yes, if you follow this technical process. By redirecting old links and rebuilding topical relevance, you are not starting from zero.
You are starting on the 30th floor, leveraging the SEO advantages of expired domains to build your asset faster and more efficiently than any competitor starting on a new domain.
Building the site and publishing your first articles is the foundation. To truly accelerate your growth, your next priority is building new, high-quality links. Learn how to start with my Ahrefs case study for building your first 10 links.
However, you need to know if your strategy is working. Check out my guide on how to measure your mini-site’s performance in the first 30 days.
Building the site is just the beginning. Over time, rankings can stale. To keep your mini-site growing indefinitely, you need a strategy for identifying and fixing content decay.
This “Develop and Sell” strategy is a core part of what domain flipping is, and it’s a powerful way to build a high-value digital asset.