You Won a Domain Auction! Now What? (Your Post-Acquisition Checklist)
Congratulations! You navigated the domain auction, applied your bidding strategies, and placed the winning bid. You now own a new domain name!
But the work isn’t over yet. The next few hours and days involve critical post domain acquisition steps to secure your asset and set it up correctly.
Making a mistake here can delay your project, cause technical headaches, or worse, even risk losing the domain you just won.
If you’re wondering “what happens after winning godaddy auction” or any other platform, this guide is for you.
This checklist will walk you through the essential steps, from finalizing payment to pointing your DNS, ensuring a smooth and secure transition for your new digital asset.
Step 1: Secure Payment & Confirm Ownership
This is your immediate priority. Most auction platforms, including GoDaddy Auctions, require payment within 48 hours of the auction closing.
- Action: Log in to the auction platform, navigate to your “Won Auctions,” and follow the instructions to submit payment immediately.
- Confirmation: Keep an eye on your email. You should receive a payment confirmation and, shortly after, an email confirming that the domain ownership has been transferred to your account within that platform. Save these emails!
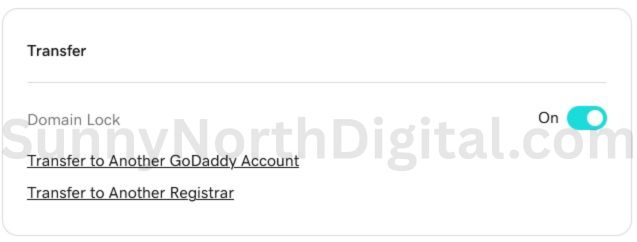
Step 2: Unlock the Domain & Get the Authorization Code (Auth/EPP Code)
Before you can move your domain to your preferred registrar, you need two things from the current registrar (where the domain is now):
- Unlock the Domain: Domains are typically “locked” by default to prevent unauthorized transfers. You’ll need to find the setting in the domain management panel (often under “Transfer” or “Security”) and toggle the lock to “Off.”
- Get the Auth Code (also called EPP code or Transfer Code): This is essentially the domain’s password for transfers. There will usually be a button or link to request this code, which will then be emailed to you. Treat this code securely. If some of these domaining terms are new, my glossary can help.
Pro Tip: Check WHOIS Privacy
While you’re in the domain settings, check if WHOIS privacy is enabled. If not, consider enabling it (it’s often free or low-cost) to protect your personal contact information from being publicly visible.
Step 3: Initiate the Transfer to Your Preferred Registrar
While you can manage the domain at the registrar where you won it, I strongly recommend transferring all your domains to a single, trusted registrar (like Cloudflare or Namecheap) for easier domain portfolio management.
- Action: Log in to your preferred registrar account. Find the “Transfer Domain” option. Enter the domain name you won and the Authorization Code you received in Step 2.
- Pay the Transfer Fee: You’ll typically pay for one year of registration renewal as part of the transfer process.
- Confirm via Email: The crucial step! You (as the new owner listed in WHOIS) will receive an email to approve the transfer. You must click the approval link in this email.
- Wait: Now comes the waiting game. How long does domain transfer take? Typically 5 to 7 days. You can usually track the status in your new registrar’s dashboard. Don’t panic if it takes the full week.
Step 4: The CRITICAL Pre-Flight Check (Final Spam Review)
Do NOT skip this step! Before you connect your newly transferred domain to your hosting and make it live, you must perform one final check for spam or penalties, especially if you didn’t do a full audit before buying.
- Action: Run the domain through Ahrefs Site Explorer one last time. This is your final chance to check for toxic backlinks or signs of a Google penalty. If you’re not 100% sure what to look for, follow my 5-step spam check guide before you point the domain to your server. For a broader analysis, compare its profile to the guidelines in my Definitive Guide to Valuing Expired Domains.
- Why it Matters: If the domain does have a toxic history, you want to address it before associating it with your clean hosting account. This involves submitting a disavow file to Google Search Console now, before you build anything on the domain. Pointing a known spammy domain to your server can potentially have negative consequences.
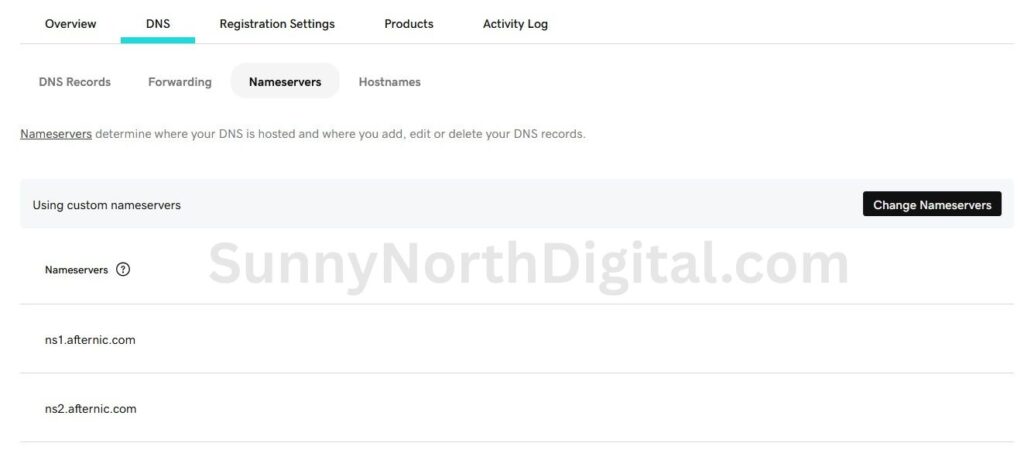
Step 5: Point Your Domain’s DNS to Your Hosting
Once the domain transfer is complete and you’ve confirmed the backlink profile is acceptable (or you’ve submitted a disavow), it’s time to connect the domain to your website host (like WP Engine).
- Action: Log in to your registrar (where the domain now resides, e.g., Cloudflare). Go to the DNS management section for the domain. You will need to update either the Nameservers or the A/CNAME records to point to the values provided by your hosting company.
- Nameservers: Easier for beginners. Your host gives you 2 nameserver addresses (e.g.,
ns1.wpengine.com,ns2.wpengine.com), and you replace the existing ones at your registrar. - A/CNAME Records: More advanced, but recommended if using Cloudflare’s security features. You get an IP address (for the A record) and potentially a CNAME target from your host and update those specific records at your registrar. (If DNS is confusing, check the glossary).
- Nameservers: Easier for beginners. Your host gives you 2 nameserver addresses (e.g.,
- Wait (Again): DNS changes, like transfers, need time to propagate across the internet. This usually takes a few hours but can sometimes take up to 48 hours.
Step 6: Initial WordPress Setup (If Applicable)
If you plan to build a site on the domain, now is the time to install WordPress (many hosts offer a one-click install), configure basic settings, and install essential plugins like an SEO plugin (Yoast/Rank Math) and a security plugin.
From Auction Win to Asset Control
Winning the auction is just the beginning. Securing your newly won domain involves a few crucial technical steps after buying domain name.
By following this post-acquisition checklist, you’ve ensured a smooth transfer, protected yourself from potential issues, and set the stage for your domain’s future success.
Remember that patience during the transfer and DNS propagation phases is key!
Now that your domain is secure and technically sound, your journey as an investor moves to the development phase.
Your next step is to learn how to build your first “mini-site” on an aged domain to start generating traffic and value.
Once your site is built, the next mission is to build its new authority. Learn how to get your first 10 links in my Ahrefs case study for finding competitor backlinks.